Sunday, 15 March 2009
Tuesday, 10 March 2009
Fence Test in Maya

This was a joint effort between Suzy and myself, Suzy created a wire fence PNG file which I then placed into Maya and using the UV repeat function was able to multiply the single wire loop into hundreds, also as you may notice there was an object placed behind the fence, this was to check that you could see through the gaps within the fence.
Cell Texturing and Lighting
Another character completed
Well its Tuesday and my tasks have not been fully completed, the plan was to get two character models created by today, but as you may have noticed I only have one. This is because a number of issues were brought to my attention over the week, many of them have previously been covered in past posts and within the group site. Also as you may have previously noticed, I taken up item modelling as a new task for the week, which wasn't originally agreed upon, this is due to the work balance showing inconsistency, some people in the group were doing too much, another thing I have done this week is work for texturing, which is Robs area, I offered to help him out with offsetting the textures for walls and floors, aswell as experimenting with textures on the models so far, I will post these images shortly to show proof of work. I need to get the last of my characters done within the next couple of days, so that I can move onto character rigging and then eventually animation. Also recently I have noticed that we have only three weeks left before easter and we need a playable build up and running, at this moment in time we are no where near close to performing this, but if the team works extra hard and keep contact between everyone tight, we should be able to pull it off.
Saturday, 7 March 2009
Model Clean-up
Well it looks like I stumbled onto a little problem with the help of a 3rd Year CGD student who is talented in Maya. The first was the fact that I have been making models using the 'old skool' model sheet method, which isn't used anymore, because the shoulder region of the model is placed in an extreme position, which can cause problems for rigging, and texturing. If I knew this sooner it would have saved time, but having the problem pointed out now, means we got time to tend to the problem, because of said problem, I had to edit the two models I already made to make sure that the shoulders were more defined. On top of that I also decided to smooth out the Frankie character model, as it was quite blocky, it still is to a certain extent, but looks far better. Another thing that had to be added to the model was extra devisions on the knees and elbows, this is very important when it gets to rigging and binding the model as there will be extreme deformations going on if there isnt enough devisions to counter-act the bend. So with all these problems addressed and fixed I can move onto the next character model now.
Friday, 6 March 2009
Item Modelling!
So I've taken a break from character modelling, and decided to tackle items instead. It is quite refreshing to be honest and I definately enjoyed making them, they are simple shapes that are easy to create, something I could do in a few minutes and enjoy. They still need texturing which will improve upon the models a huge amount, I may have a go at texturing them later, but I thought I would post the work in progress of these items, which is something that I definately don't do often enough.
Thursday, 5 March 2009
Another One Down...
This model has given me hell. I don't know what happened, but all the faces doubled themselves and convienently placed themselves just behind the actual model faces, meaning that I ended up spending time removing the faces one by one, which has been the most boring thing I've ever had to do, even watching paint dry would more than likely be more entertaining. Anyway, the model is of Frankie; a junkie inmate of the first wing, he is a pretty important part of the script and i wanted to make sure he looked half decent, this model went a little over the poly limit, around 3120 polys. There are a number of places on the model where they look a bit funny, I tried to fix this but it was eating up too much of my time, as I have another two models to complete by next Tuesday, so I've got to leave it as it is and move on to the next one. The next character will be Mickey; who is a bit of a loner. He has cowboyesque look about him. So I'll keep you posted on the progress of that character over the next few days.
Sunday, 1 March 2009
One down, hell of a lot more to go!
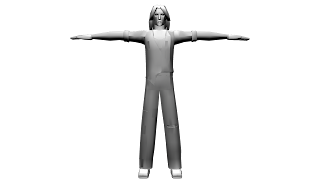
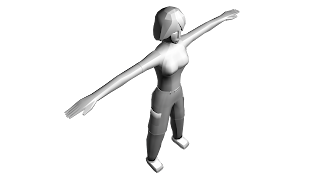
Well, it's taken a while but I've completed the model of main character Jackie Baker. The model has a poly count of 2898, that is just under the given poly limit which was 3000 poly's per character. I am going to get started on making a model of the character Frankie tonight. Jon who is working on character models with me has finished modelling Alice and has decided to model Big Buddha, meaning by next week sometime we will have 4 out of the 9 characters modelled!
Subscribe to:
Posts (Atom)


